 Zylcut
User guide
Last updated 5 November 2026
Zylcut is a video editor where the edit is a source file. You can cut it by hand on a timeline, ask a coding agent on your computer to do it, or both at once. This guide walks through the app. Shortcuts are shown for macOS; on Windows and Linux, ⌘ is Ctrl and ⌥ is Alt.
Install and sign in
Download Zylcut for macOS, Windows or Linux from the download section. The installers are not signed by Apple or Microsoft yet, so the first launch needs one extra step:
- macOS: open the app once, then go to System Settings > Privacy & Security and choose Open Anyway.
- Windows: when SmartScreen appears, choose More info, then Run anyway.
Zylcut needs a free zylcut.com account. Choose Sign in with your browser, sign in there, and the app unlocks. Signing in the first time starts a 14-day free trial. Your footage and projects never leave your computer.
Projects and media
The Projects page lists your projects. New project asks for a name and a format: Landscape 16:9, Vertical 9:16, Square 1:1 or Portrait 4:5. Projects are folders, kept in a Zylcut folder in your home folder unless you choose another in Settings > Projects. Open folder… adds a project folder you already have. Each project's menu can open, rename, duplicate, show it in its folder, remove it from the list, or delete it.
To bring in footage, drag files onto the Project panel or use its Import button. Files are linked where they are, never copied, so keep them where they are while you edit. Bins organize the library, and the Metadata panel holds notes about a file.
The editor
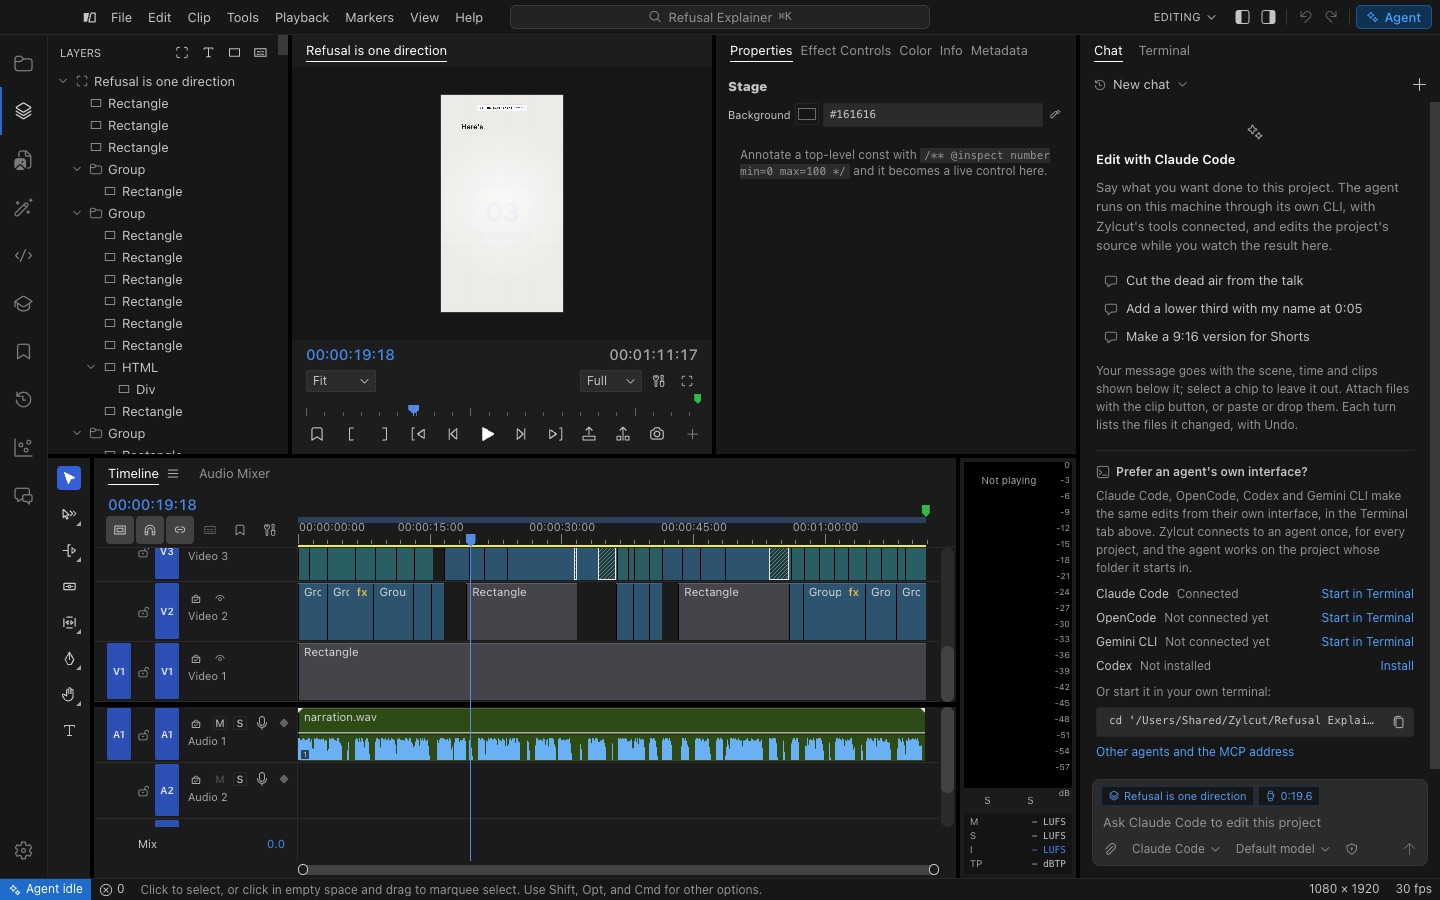
- Activity bar (far left) opens the left side bar's panels: Layers, Project, Effects, Code, Script, Skills, Markers, History and Scopes.
- Program monitor plays the scene. The button at the right of its footer, or the ` key, maximizes it to fill the editor; Esc brings the layout back.
- Secondary side bar holds Properties, Effect Controls, Color, Info and Metadata.
- Agent dock at the right edge holds the chat and a terminal. The highlighted Agent button at the top right shows or hides it (⌃⌘I).
- Timeline at the bottom, with the Audio Mixer beside it and loudness meters on its right.
Workspaces arrange the panels for a job: Editing (⌥⇧1), Assembly (⌥⇧2), Color (⌥⇧3), Effects (⌥⇧4) and Audio (⌥⇧5); on Windows and Linux use Alt and the digit. A workspace remembers changes you make to it until you choose Reset to Saved Layout (⌥⇧0).
Command search (⌘K) finds any command or project by name, with its shortcut.
Editing with an agent
Zylcut works with the coding agents you already have on your computer: Claude Code, OpenCode, Codex, Cursor and Gemini CLI. The agent edits the project's source while you watch the result in the editor.
- Type what you want in the chat, such as "cut the dead air from the talk". Your message goes with the scene, the playhead time and the selected clips, shown as chips under the box; select a chip to leave it out.
- Attach files with the clip button, or paste or drop them.
- Pick the agent and its model under the box. Ask first makes the agent ask before it runs a command; Auto-approve lets it run them without asking.
- Each turn lists the files it changed, with a diff and Undo.
- Help > All Agent Chats lists every chat in every project.
Some work is done only by agents for now: adding music, sound effects and ducking music under a voice.
Your agent's own interface
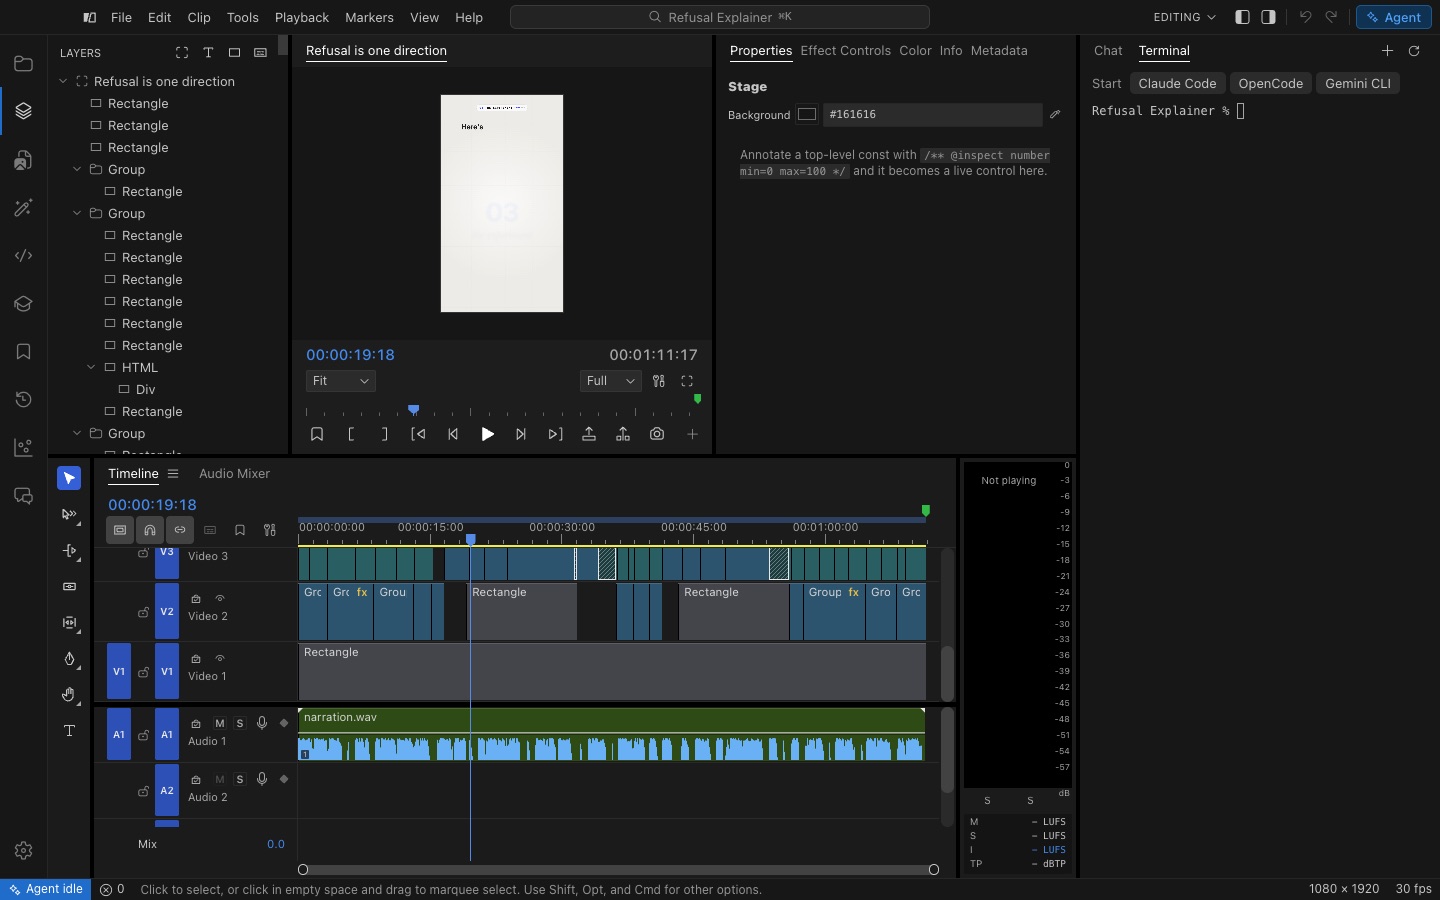
If you would rather use Claude Code or OpenCode in their own interface, open the Agent dock's Terminal tab. It is your own shell, already in the project's folder. Choose an agent under Start and Zylcut connects its tools to that agent, if they are not connected yet, then starts it there.
Connecting is done once for every project: the agent works on the project whose folder it starts in. Each project folder also has an AGENTS.md (and a CLAUDE.md that points to it) telling any agent it is in a Zylcut project and how to work on it. Notes you add below its marker line are kept.
No agent yet? The chat and the Terminal offer OpenCode, which is free to start. Install OpenCode runs its official installer in the terminal, and its Start button appears when the install finishes. The + in the Terminal's tab row installs the others.
Cutting on the timeline
Drag files from the Project panel onto the timeline. The tools are on the timeline's left edge:
- Selection (V), Track Select (A, ⇧A backwards), Ripple Edit (B), Rolling Edit (N), Rate Stretch (R), Razor (C), Slip (Y), Slide (U), Pen (P), Hand (H), Zoom (Z) and Type (T).
- Add Edit (⌘B) cuts the clips under the playhead. Lift (;) and Extract (') remove the marked range, leaving a gap or closing it.
- Mark In (I) and Out (O) on the Program monitor to set the range you work on and export.
- Markers (M) sit in the source, so agents see them too.
- History lists every change; every app action is one undo step (⌘Z).
Anything you change in the editor is written back to the project's source, and anything an agent writes appears in the editor.
Effects, color and sound
- Effects (⇧7) lists the effects and transitions; drag one onto a clip. Effect Controls (⇧5) sets its values and keyframes.
- Color has Basic Correction, Creative, Curves, Color Wheels, HSL Secondary and Vignette. The Scopes panel reads the pixels the Program monitor shows.
- Audio: the meters show loudness in LUFS, and the Audio Mixer (⇧6) has a fader, pan, mute and solo per track.
- Voice: the Script panel writes and voices narration with the engine chosen in Settings > Voiceover (Kokoro and Supertonic run on your computer; ElevenLabs, Cartesia, Google Gemini or your own server use your key). To record yourself, use the microphone button on an audio track's header.
Skills
A skill is a set of instructions an agent follows: an editing style, a caption look, a channel's rules. The Skills panel lists your project's skills, the ones for all your projects, and the ones you installed from the Skill Library.
- New Skill… writes one from scratch. Save This Video as a Skill… asks the agent to describe the style of the video you made, so it can make the next one the same way.
- Skill Library installs skills made by Zylcut, with example projects you can open a copy of.
- Use in This Project tells agents to follow a skill in this project.
Export
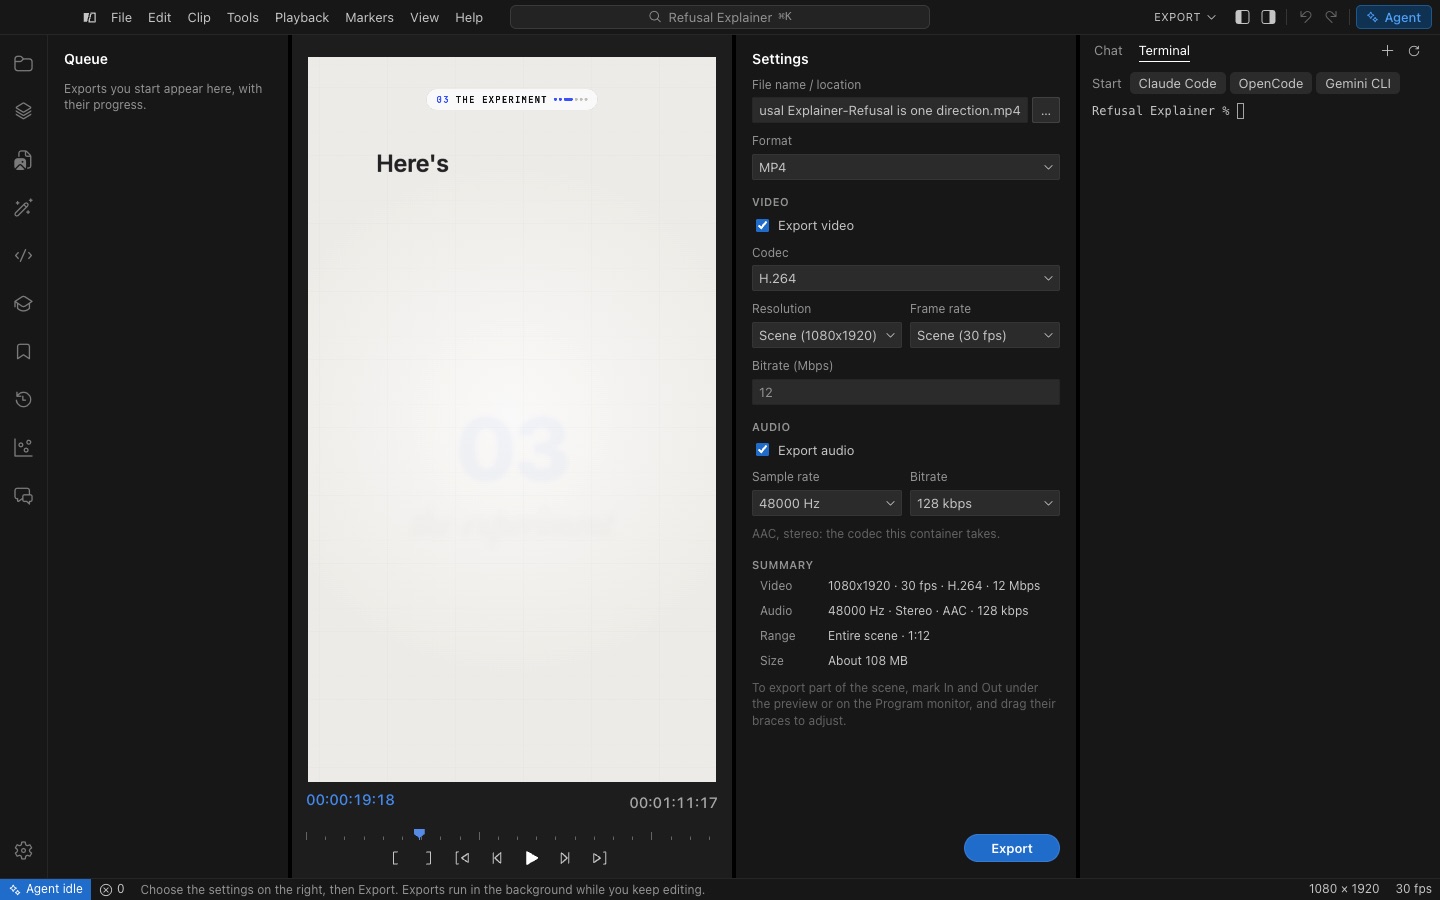
File > Export Scene... opens the Export page. Choose the format (MP4, QuickTime, WebM or Ogg), the codec (H.264, HEVC, AV1, VP9 or VP8), resolution, frame rate, bitrate and audio settings; the summary shows the result and its size before you start. The range is the scene's work area: to export part of the scene, mark In and Out. Exports run in the background and appear in the queue while you keep editing.
Settings and help
Settings (⌘,) has Account, Agents (connect an agent to Zylcut's tools, and the MCP address for any other), Voiceover, Transcription, Projects, Privacy and About.
The Help menu has this User Guide, All Agent Chats, Report a Problem… (with a preview of exactly what is sent), Show Logs and Check for Updates…. Questions are welcome at support@zylcut.com or through the contact form, and subscribers can book a call from their account page.
Keyboard shortcuts
| Command search | ⌘K |
| Show or hide the Agent dock | ⌃⌘I |
| Maximize the Program monitor | ` |
| Play, pause | Space |
| Mark In, Mark Out | I, O |
| Add Edit | ⌘B |
| Lift, Extract | ; and ' |
| Undo, Redo | ⌘Z, ⇧⌘Z |
| Project, Effect Controls, Audio Mixer, Effects | ⇧1, ⇧5, ⇧6, ⇧7 |
| Workspaces | ⌥⇧1 to ⌥⇧5, ⌥⇧0 resets |
| Settings | ⌘, |
Command search shows every other command with its shortcut.